Now we have came to the
stage where we are bringing the filming to an end and trying to find different
sound to suit our film opening. For this, we used a website called,
'freesound'. This is a website that lets you download different sound, in our
case, horror sounds. You sign up to gain access to the sounds that we want. We
can download these sounds completely free and are copyright free. Through the
next couple of lessons why we are editing our opening, we will search the
websites database to try and find the best sound that suits our opening to the
'Caretaker'. Below you can see the website that we are getting our sound from and
how we are using it.
Wednesday, 24 April 2013
Tuesday, 23 April 2013
Production: Adding extra footage
One we had film what we needed to film at the shed for our location, we soon started to import and edit the footage on the IMacs. Although one we had made a rough edit of the opening, we soon realised that we did not have enough footage to cover the whole two minutes of the opening. Therefore we came up with different ideas to add more footage to the opening. We decided that we would have the victim, Tania walking to school and getting ready to leave, why the caretaker planning to kill her in his work shed. We will cross the two together when editing the footage.
Here is what extra footage we had to include:
Here is what extra footage we had to include:
- Tania getting ready in her room in the morning, before she leaves for school.
- Tania walking through the woods of the way to school.
- Through small alleyways
- Walking why on her phone
- Writing a status on a social networking site, Facebook, saying 'Walking to school'
- Finally walking towards St Marlows school
Monday, 22 April 2013
Post Production: Importing the footage and starting the editing
Here i am going to brefily explain the importing process and how we are going to edit our footage on the Apple IMacs using software called Final Cut Express.
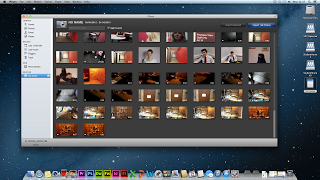
Below you can see that we have put our memory card from the camera with our footage on, onto the IMacs. IPhoto instantly opens showing all of the pictures and video footage on the memory card for us to select what ones we want. Once we have decided what footage we want, we have to select it all and click, 'import selected' on the top right hand corner on IPhoto.

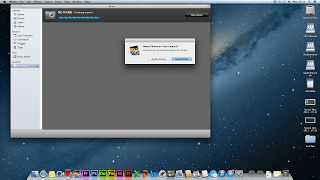
Here, we have selected 'Import selected' and our footage is being imported onto the IMac

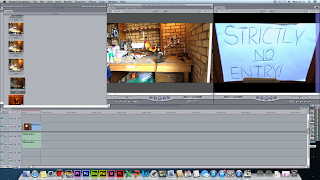
Thirdly, we opened Final Cut Express and dragged our folder with our footage onto the software, Now we can select what footage we want and cut the footage to how we would like it.

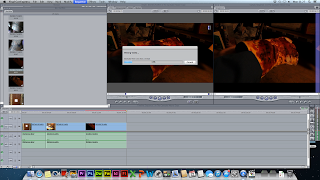
Now once we have dragged the correct, edited footage into the timeline, we have to render the footage to watch it back.

Below you can see that we have put our memory card from the camera with our footage on, onto the IMacs. IPhoto instantly opens showing all of the pictures and video footage on the memory card for us to select what ones we want. Once we have decided what footage we want, we have to select it all and click, 'import selected' on the top right hand corner on IPhoto.

Here, we have selected 'Import selected' and our footage is being imported onto the IMac

Thirdly, we opened Final Cut Express and dragged our folder with our footage onto the software, Now we can select what footage we want and cut the footage to how we would like it.

Now once we have dragged the correct, edited footage into the timeline, we have to render the footage to watch it back.

Subscribe to:
Comments (Atom)